

This article delves into the world of API Authorization, offering practical insights and best practices to ensure your digital gateway remains secure and efficient.
APIs (Application Programming Interfaces) are like secret handshakes allowing different software programs to communicate effortlessly. However, just like you wouldn’t hand out your house keys to everyone, not every software should have free rein to every API.
These APIs power your online banking experience to manage your social media interactions, these APIs seamlessly link various applications, managing crucial tasks and safeguarding sensitive information.
Neglecting robust authorization measures for APIs opens the door to potential misuse, paving the way for data breaches, service hiccups, and eroding the trust users place in your system.
So, this is where API authorization comes into play.
API authorization acts like a digital gatekeeper, making sure that only the trusted apps armed with the correct credentials get access to the VIP lounge of your system. It goes beyond just locking the door; it’s the key to a smooth and secure user experience, ensuring that only the right apps can access specific data and perform actions within their designated boundaries.


Understanding API Authorization
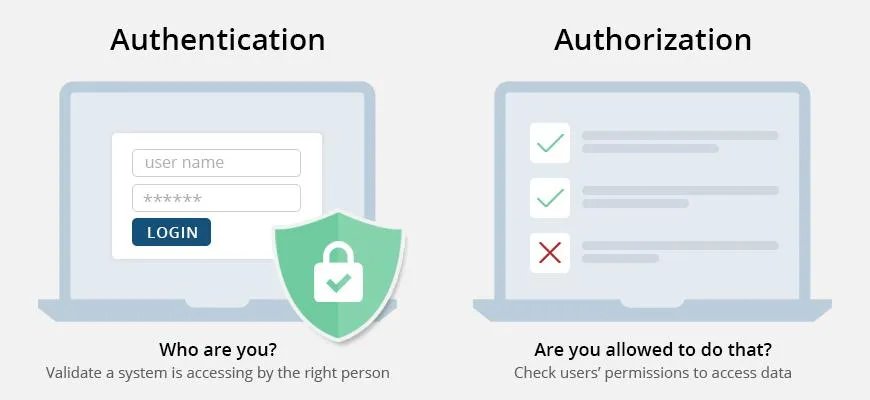

Before we discuss the world of API authorization best practices, we must understand the confusion between two key concepts: authentication and authorization.
- Authentication is akin to checking someone’s ID – it’s the process of confirming who they are, whether it’s through a username and password combo, or even the uniqueness of their fingerprints or face.
- Authorization is the backstage pass after proving who you are – just like authentication gets you past the entrance, but authorization decides which VIP areas and perks you get to enjoy behind the scenes.
Best Practices in API Authorization
Now that we’ve uncovered the significance of API authorization, let’s explore some practical tips to make the most of it and keep your digital interactions secure and seamless.
-
Token-Based Authorization (JWT, OAuth Tokens)
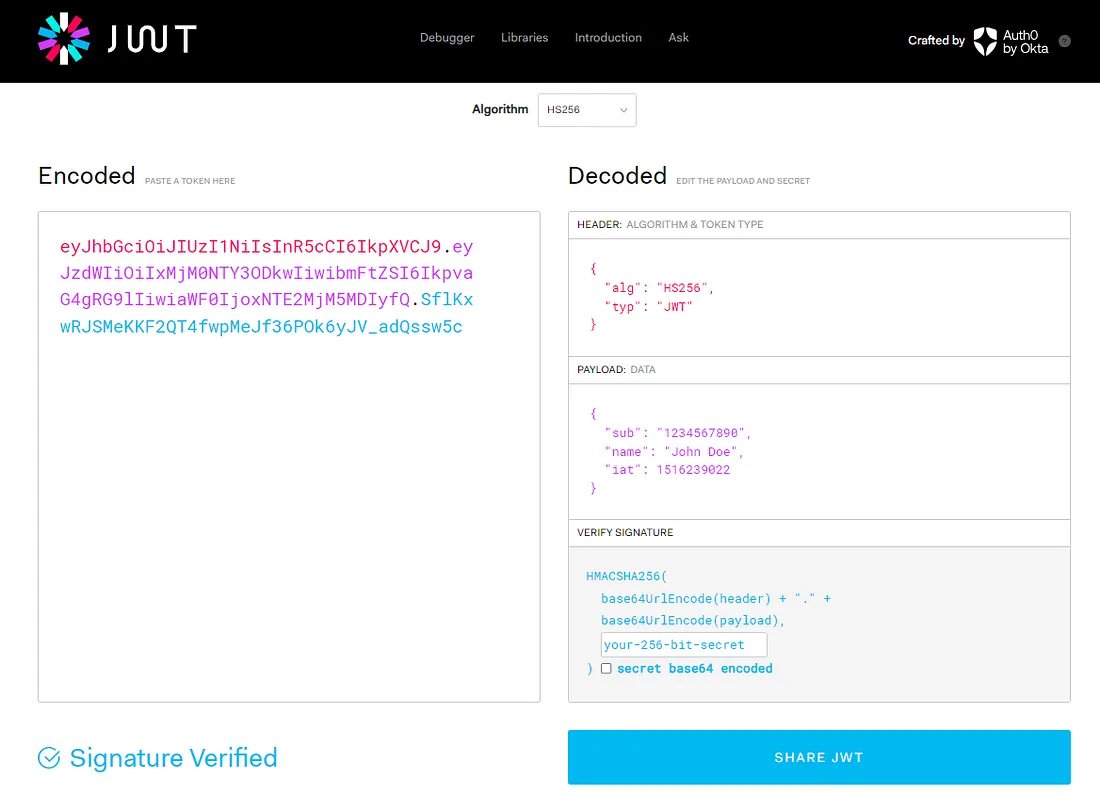

Secure your API interactions effortlessly through token-based authorization, especially with user-friendly options like JWT (JSON Web Tokens) and OAuth tokens, providing a reliable and efficient approach to managing access with peace of mind. For example:
- Using tokens for authentication offers a hassle-free experience by allowing the server to avoid keeping track of individual user session states, resulting in a more scalable and efficient system.
- Safely passing tokens through different channels provides an extra layer of security, making them a more resilient choice against CSRF attacks compared to the older session-based authentication methods.
- Tokens as versatile keys that effortlessly unlock access not only in microservices setups but also streamline the user experience in single sign-on (SSO) applications across various domains.
- OAuth tokens, like superheroes with specific powers, come with scopes and permissions, offering a tailored control system that lets authenticated users perform only the actions they need.
How to Implement Token-Based Authorization with JWT
Once a user successfully logs in, JWTs are generated to encapsulate their information and, in some cases, permissions. To seamlessly implement JWT authorization in your Node.js application, consider leveraging libraries like jsonwebtoken or opt for PyJWT if you’re working with Python.
First, you need to generate the JWT token. Here is how you can do it using PyJWT:
import jwt

from datetime import datetime, timedelta
secret_key = 'YOUR_SECRET_KEY'
payload = {
'sub': user_id,
'iat': datetime.utcnow(),
'exp': datetime.utcnow() + timedelta(days=1)
}
token = jwt.encode(payload, secret_key, algorithm='HS256')
Afterwards, it’s crucial to check every incoming request to determine whether the user has the right permissions. The token, usually included in the Authorization header of each request, is like a digital passport. The server uses a secret key to decipher and authenticate the token – if it’s legitimate, the server proceeds with the request; otherwise, it gracefully handles the situation by signaling an error.
from flask import Flask, request, jsonify

import jwt

import datetime
app = Flask(name)
SECRET_KEY = "your_secret_key" # Replace with your secret key
Sample route that requires token-based authorization
@app.route('/protected', methods=['GET'])
def protected():
token = request.headers.get('Authorization')
if not token:
return jsonify({'message': 'Token is missing!'}), 403
try:
# Decoding the token
data = jwt.decode(token, SECRET_KEY, algorithms=["HS256"])
# You can use the data in the token as needed, for example:
# user_id = data['user_id']
except jwt.ExpiredSignatureError:
return jsonify({'message': 'Token has expired!'}), 403
except jwt.InvalidTokenError:
return jsonify({'message': 'Invalid token!'}), 403
# Token is valid, process the request
return jsonify({'message': 'Token is valid! You have access to protected routes.'})
-
Implement Fine-Grained Access Control

Think of fine-grained access control as your digital bouncer—it’s like having a vigilant guardian for your applications, meticulously managing who gets access and ensuring that each user or service only holds the keys they need, following the ‘just enough access’ philosophy.
How to Implement Fine-Grained Access Control:
Implementing fine-grained access control involves several steps:
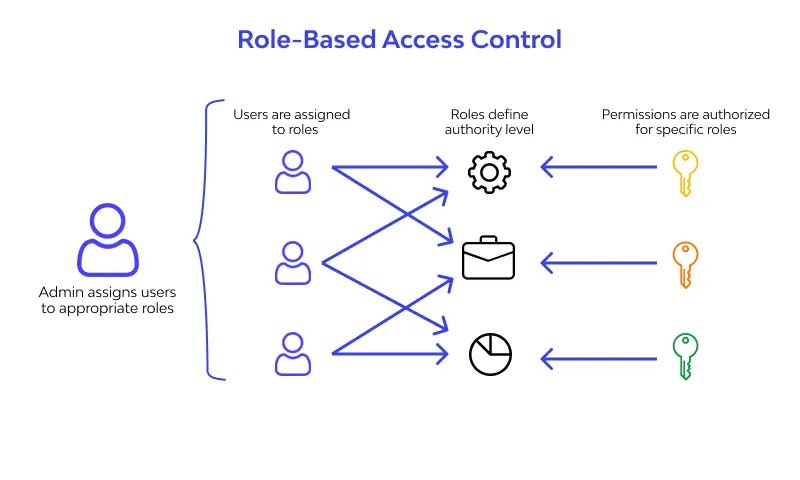
- Define Roles and Permissions: Pinpoint the various roles users play in your system, and outline the specific tasks and actions associated with each role for a clearer understanding.
- Use Role-Based Access Control (RBAC): Set up RBAC to determine who gets access to what – roles define responsibilities, and each role comes with its own set of permissions, ensuring a tailored and secure user experience.
- Consider Attribute-Based Access Control (ABAC): In situations that demand a higher level of sophistication, you can turn to Attribute-Based Access Control (ABAC), which makes access decisions by considering a mix of factors such as the user, the resource, and the environment.
For example, If your application involves different levels of access for admins and regular users through an API, consider using versatile, reusable components to effortlessly integrate and manage access control mechanisms across various sections of your system.
For instance, tools like Bit into your setup, enable the build of a dedicated authorization component that takes charge of approving API requests independently.

All you’d have to do is:
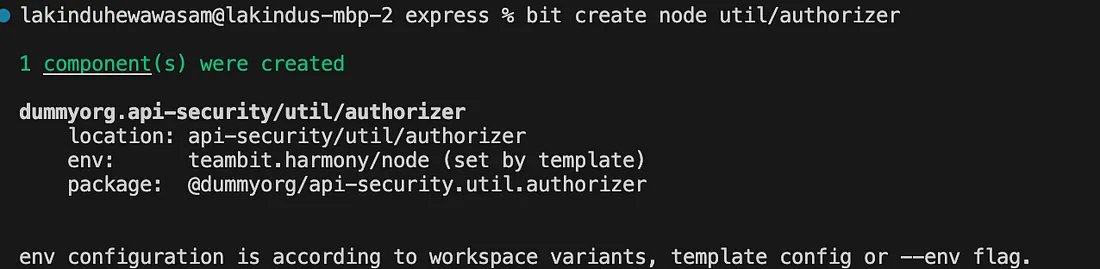
- Create a Node.js component called “authorizer” that lets you implement your auth logic using the command:
bit create node util/authorizer
If you do this correctly, you’ll see the output:

Next, implement your authorizer logic:
export function authorizer(userId: string) {

// Implement logic to retrieve the user's role

if (userId === 'U001') {

return "admin";

}

return "customer"

}
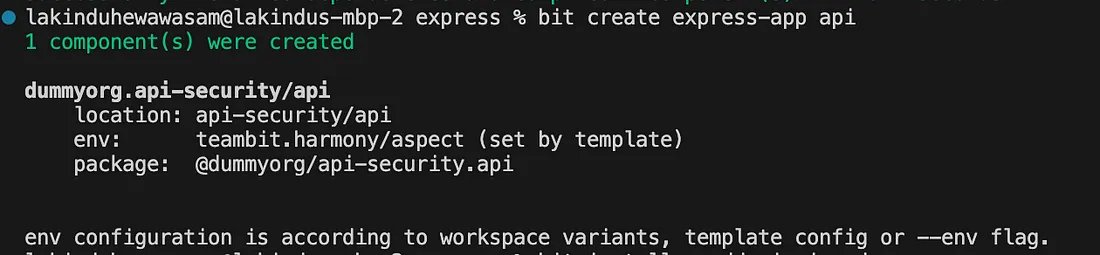
Next, create an Express App using the command:
bit create express-app api
You’ll see the output:

Next, let’s hook up the authorizer to the app by updating the mock-route.ts. Initially, you’ll see this:


Let’s add a new middleware:


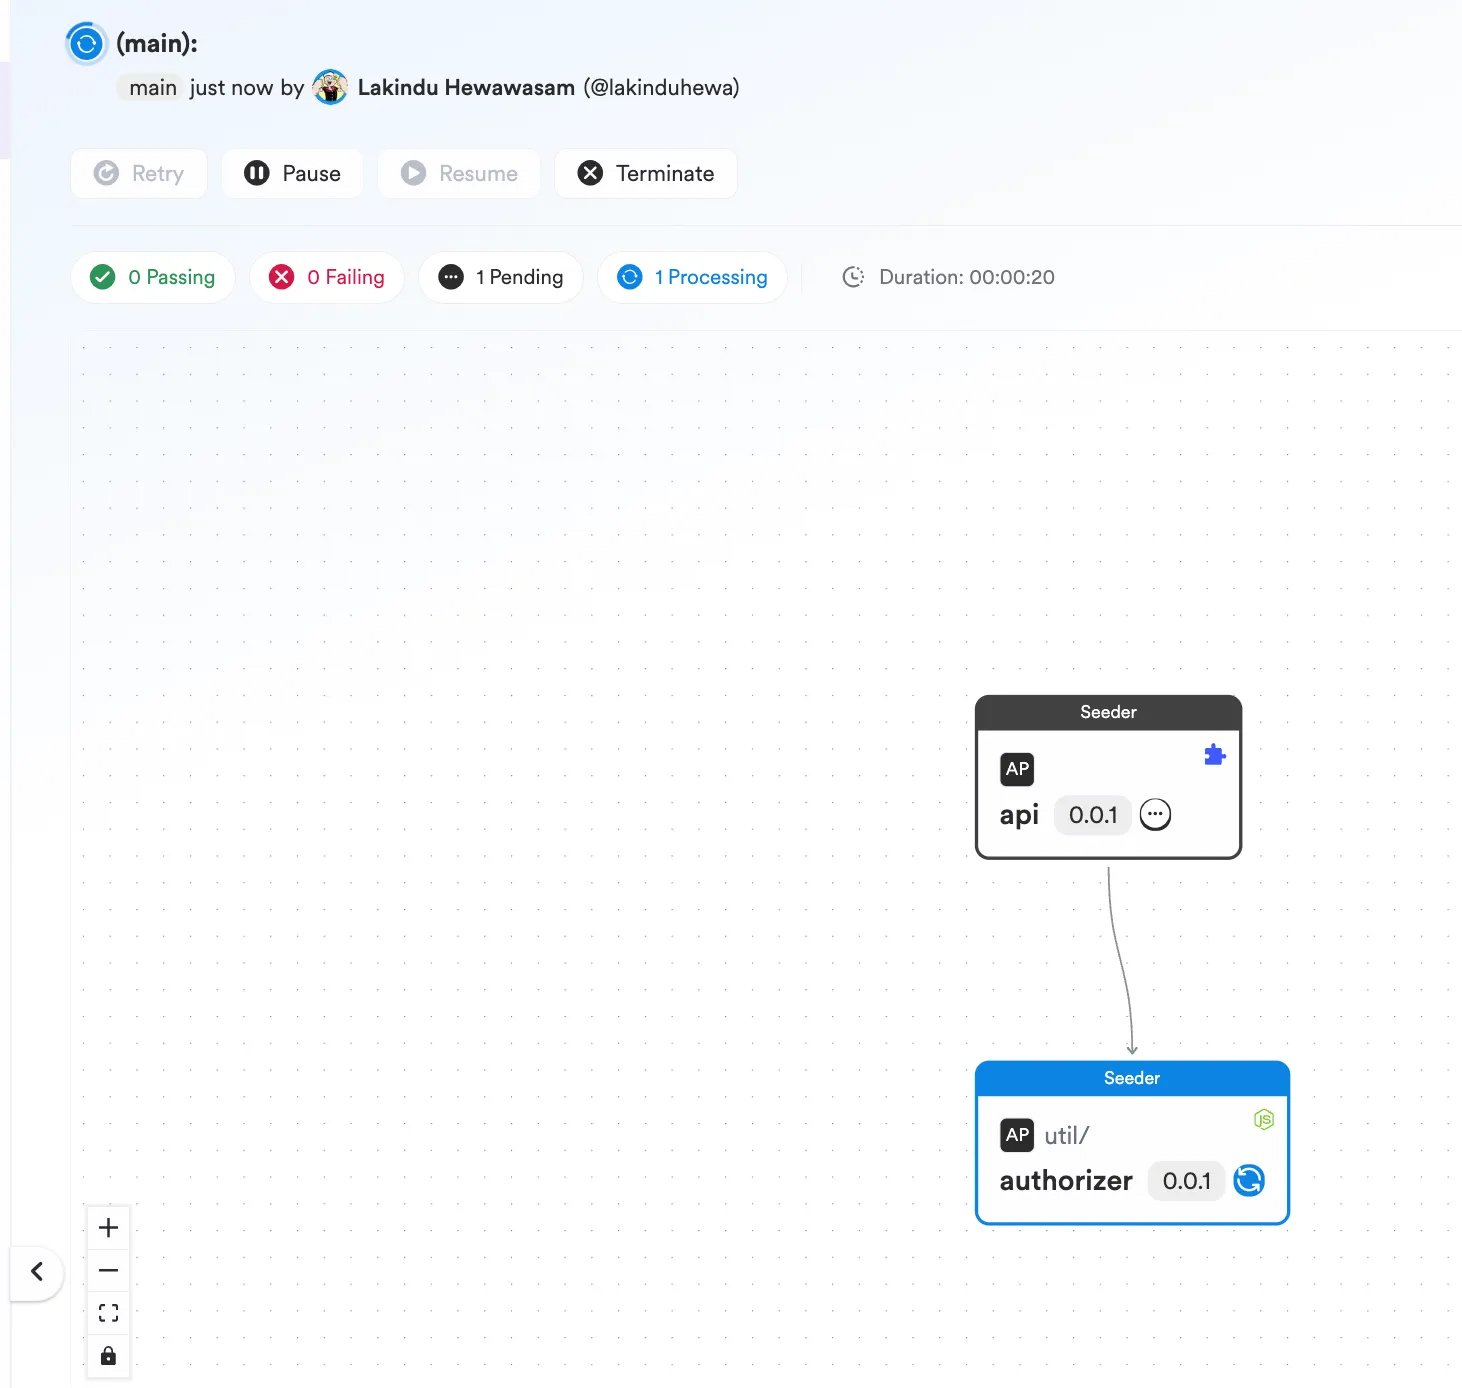
This will ensure your authorizer component runs before it invokes the actual business logic. After you run your API, you should see the following output:


Through linking functions together, we’ve established a role-based access control system. The decorator examines whether the user’s role aligns with the necessary roles for the endpoint, and if not, it gracefully returns a message signaling access denial.
And, as you keep updating the authorizer logic and updating the app, With Bit’s CI Server — Ripple CI, those updates effortlessly cascade across the entire system, ensuring seamless integration and hassle-free development.

-
Secure API Gateway Configuration


An API Gateway like the front door at the entrance for every API request, provides a centralized place to enforce essential security and operational policies. For example, API Gateways assist you in:
- Enhanced Security: Adds an extra shield of protection, keeping your system safe from potential dangers such as DDoS attacks, unauthorized entry, and misuse of your API.
- Rate Limiting and Throttling: Keeps a check on excessive API usage, ensuring a fair and equitable experience for all users.
- Data Transformation and Validation: Checks incoming data to make sure it follows the expected formats and standards.
How to Implement Secure API Gateway Configuration:
When it comes to selecting an API Gateway for your application, you have a variety of options to explore. Some widely used platforms include Amazon API Gateway, Kong, and Apigee by Google, each offering unique features to enhance your API management experience.
If you are planning to use AWS, you can follow the steps in their documentation to easily create an API Gateway. However, there are a few additional things you need to enable to ensure the API Gateway is secure and efficient.
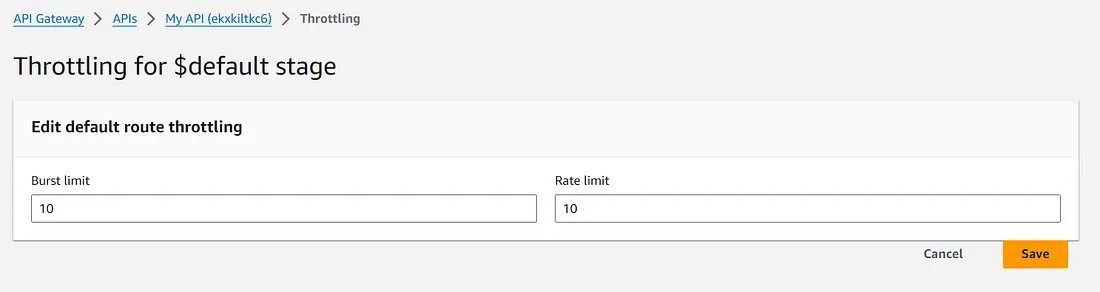
- Setup Rate Limiting — In the AWS Management Console, navigate to Amazon API Gateway, select your API, and go to the Throttling section under the Protect tab. There, you can set the rate and burst limits.

- Enable SSL/TLS — Ensure that your custom domain name for the API Gateway is associated with an SSL/TLS certificate in AWS Certificate Manager.
- Implement IP Restrictions — Use AWS Lambda authorizers to validate the IP addresses of incoming requests. Once the function is deployed, you can select it by creating a new authorizer for the API Gateway in the Authorization tab. Here is a sample Lambda function in Python for restricting IPs:
import json
def lambda_handler(event, context):
ip_address = event['requestContext']['identity']['sourceIp']
allowed_ips = ['192.168.1.1'] # List of allowed IPs
# Add logic here to check if the ip_address is in allowed_ips or not
if ip_address not in allowed_ips:
raise Exception('Unauthorized')
return {
'principalId': 'user',
'policyDocument': {
'Version': '2012-10-17',
'Statement': [{
'Action': 'execute-api:Invoke',
'Effect': 'Allow',
'Resource': event['methodArn']
}]
}
}


- Enable CloudWatch Logs — In the AWS Management Console, go to the settings of your API Gateway. In the CloudWatch Settings section, check the Enable CloudWatch Logs option. Set the log level to INFO to log all requests and responses or ERROR to log only error responses.
-
Encrypt Sensitive Data in Transit and at Rest

Encrypting sensitive data in transit and at rest is a fundamental security practice to protect data from unauthorized access and breaches. Encryption in transit safeguards data as it moves between clients and servers, while encryption at rest secures data when stored on a disk or database.
How to Implement Encryption in Transit
If you are using your web server, you must manually set up and manage SSL/TLS certificates. First, you need to obtain certificates from a trusted Certificate Authority (CA) like Let’s Encrypt, DigiCert, GoDaddy, etc. Then, configure your server to use the CA. For example, here is how to configure SSL with Nginx:
- Modify the Nginx configuration file (typically found at
/etc/nginx/nginx.confor/etc/nginx/sites-available/your_site).
Add SSL settings in the server block:
server {

listen 443 ssl;

server_name yourdomain.com;
ssl_certificate /path/to/your/fullchain.pem; # Path to your fullchain.pem from CA
ssl_certificate_key /path/to/your/privkey.pem; # Path to your private key from CA
# Strong encryption settings (consider using recommendations from Mozilla's SSL Configuration Generator)
ssl_protocols TLSv1.2 TLSv1.3;
ssl_ciphers 'ECDHE-ECDSA-AES128-GCM-SHA256:ECDHE-RSA-AES128-GCM-SHA256...';
# Other server configurations...
}
If you use a cloud service, they offer fully managed services for handling SSL/TLS. For example, you can use AWS Certificate Manager for services hosted in AWS.
How to Implement Encryption at Rest
You can implement encryption at rest at the database level, application level, or using cloud-based tools.
- Database-Level Encryption: Many modern databases offer built-in encryption features. For example:
- SQL Server: Transparent Data Encryption.
- MySQL: InnoDB tablespace encryption.
- MongoDB: Encrypted Storage Engine.
- Application-Level Encryption: Application-level encryption should be used with highly sensitive data to encrypt them even before storing them in the database. You can use libraries like cryptography for this:
from cryptography.fernet import Fernet
# Generate a key
key = Fernet.generate_key()
cipher_suite = Fernet(key)
# Encrypt data
encrypted_data = cipher_suite.encrypt(b"Sensitive Data")
# Decrypt data
decrypted_data = cipher_suite.decrypt(encrypted_data)
Ensuring a strong API authorization system is essential to safeguard your digital treasures and uphold the trust of your users.
By incorporating these tried-and-true techniques, developers can boost their applications’ API security, guarantee compliance, and fortify defenses against a range of cyber threats, all while keeping things user-friendly and hassle-free.